August of 2017 I had the unbelievable opportunity to visit the DC Fountain Pen Super Show, which was an amazing experience. Apart from being overwhelmed by all the stunning pens, the best thing about the show was meeting the wonderful pen people and seeing online friends in real life. One of them is Yen Yen, also known as @2Yens on Instagram. We talked pens and small business and she told me about her dream plan of selling the pen rolls she made herself. I loved the roll she was carrying with her and she asked if I would be interested in doing a review of one as soon as she was ready to launch her shop. I happily said yes and a couple of months after DC when Yen Yen was on the brink of launching Yenderings I had the opportunity to test drive the site, together with a couple of other insta pen friends. Her website is a joy to visit, beautiful pictures, clear, concise item descriptions and a lovely choice of fabrics. I chose a Toronto AM pen roll to try out and review because I love monochrome base colors with a good red pop of color to dress it up a little. I have had a good few months to try it out and I love it! So, let me tell you a little bit about it…

WHAT IS IT
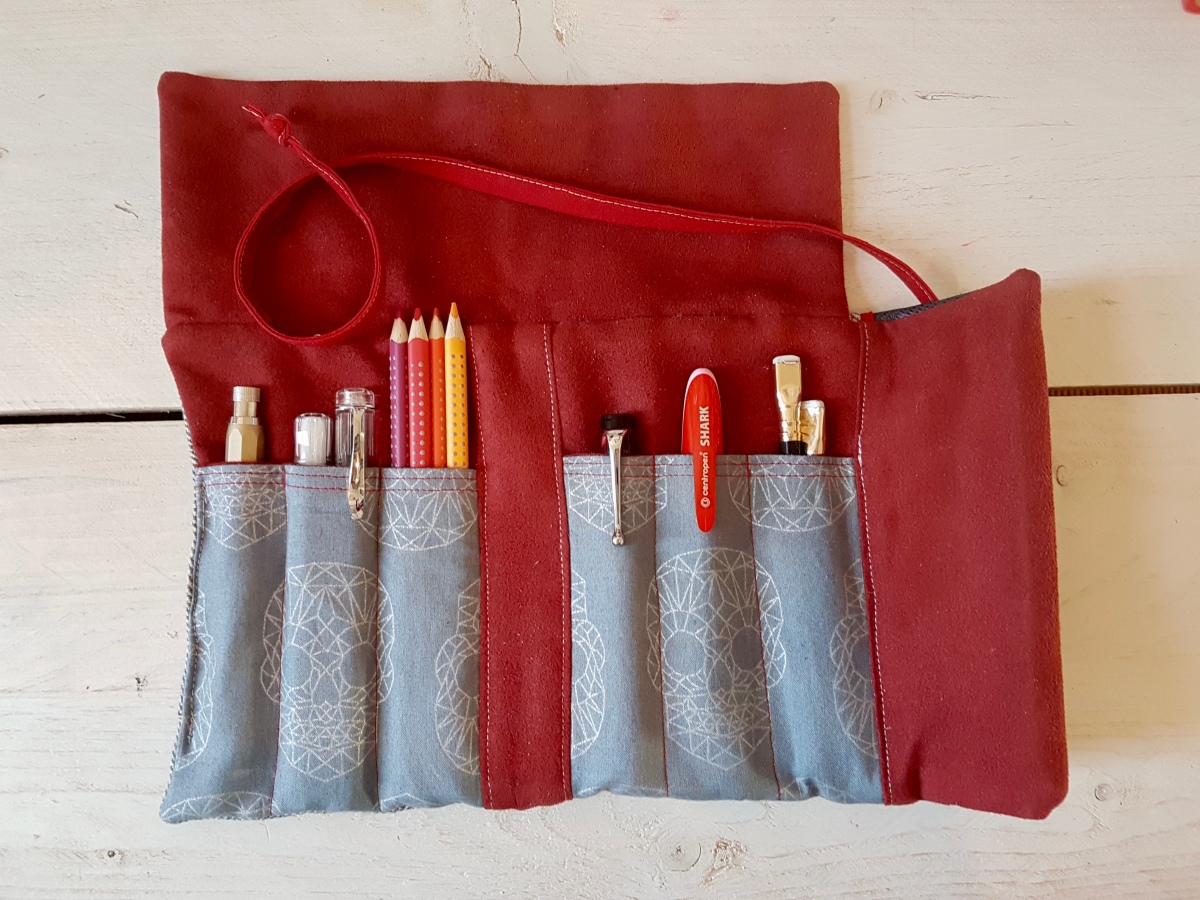
The Yenderings Toronto YYZAM01 Ride the Rocket pen roll is a fabric fold-over pen roll to hold six or more pens or other stationery necessities that fit in the pen pockets. The back pocket holds at least two A6/Field Notes sized notebooks and has room for even more pens. The pen roll folds open to six pen slots, three on each side of the “spine”. The back has a slanted notebook slot. The stitching is very neatly done and the spine is stitched so that it provides a good support when the roll is folded. The fold-over flap is made with a nice contrasting leather. The inner material is a soft ultrasuede that will not be abrasive to your pens. The pen roll closes with a hand-sewn wrapping chord.
Apart from the Toronto model, Renderings also offers the London models which will hold an A5 sized notebook and more stationery supplies.

MATERIALS USED
Yen Yen gives nice comprehensive lists of the materials she uses for each of her models and choice options. The Toronto AM01 Ride the Rocket is made of a grey herringbone cotton/linen blend on the outside. The lining is of red ultra suede, a soft ultrasuede that will be very kind to your pens. A hand-sewn cotton chord is attached to close the pen roll when folded over. The feature fabric -as Yen Yen calls it- is the material used for the pen slots, a grey fabric with a graphic silver skulls pattern. The material used for the fold-over flap is a pressed leather. It gives the suit-like herringbone a nice little edgy oomph. I love the combination of materials, a neutral base with plenty of attention-grabbing elements. An EDC roll that is something quite different from what’s available from large-scale producers.
WHAT DO I CARRY IN IT
Because the Toronto in this color scheme fits perfectly with the A5 red leather diary I use for family matters, I have been carrying my diary and journaling supplies in it. Left to right above: a Koh-I-Noor Hardtmuth 5.6mm lead holder aka mechanical pencil (a Dutch Pen Club gift from Dries), a Pilot Kaküno Clear and a Caliarts Ego that fit snugly together in the next pocket, four Faber-Castell colour grip pencils, an Aurora Optima, a Centroped Shark (kindly gifted to me by the lovely Mishka) and two Blackwing pencils. In the back pocket is an Ed the Cat Notebook, which is Field Notes sized. I have also carried small rulers and correction fluid pens in the pockets.
For watercolorists, I imagine the back pocket will easily hold a small pallet of pans and a small watercolor art book. Super nice for nature hikes or urban sketching!
WHAT’S IT LIKE IN USE
As I have been using the pen roll for my daily family diary, I have used it intensively over a couple of months and the one thing that I noticed is how nicely the materials have settled pretty quickly. It is like a pair of jeans, it warms up with wear and use and holds your stationery items with style and comfort. I was worried that I might find the roll too soft, being used to hard shell and leather covers and pen cases, but the double material layers and lining helps to give this pen roll sturdiness. The hardwearing stitching and having a notebook in the back pocket all add to the backbone of this pen roll. That’s what I enjoy about it: it is pettable practicality! It’s ideal for carrying your school, uni or office essentials with care and style. I love the combination of fabrics, colors and materials. I did have to get the hang of using the wrapping chord, but that is just me being clumsy. The chord is long enough for a wrap and tie. Sometimes I fold the chord one turn extra and tuck it in the back pocket for “quick release”.
SHOP AGAIN?
For sure! I love supporting small businesses and owning original things. Yen Yen will also take custom orders for special fabric combinations. The attention to design, use of fabric and color combinations make these rolls stand out from other pen rolls and journal covers. So a huge thank you to Yen Yen for reaching out to me and trusting me to try her design! Wishing you every bit of success Yen Yen and so hope to see you again one day!
DISCOUNT CODE!
Yen Yen is kindly offering a discount code for my blog readers. Use the coupon code Janine10 to get a 10% discount at check-out. Thank you, Yen yen for this gracious discount! Visit her webshop at www.yenderings.com.
Disclaimer:
I received this item for test and review purposes. I paid for shipping myself. I was not otherwise rewarded for this review. All views, opinions and pictures are my own. This blog post does not contain affiliate links.
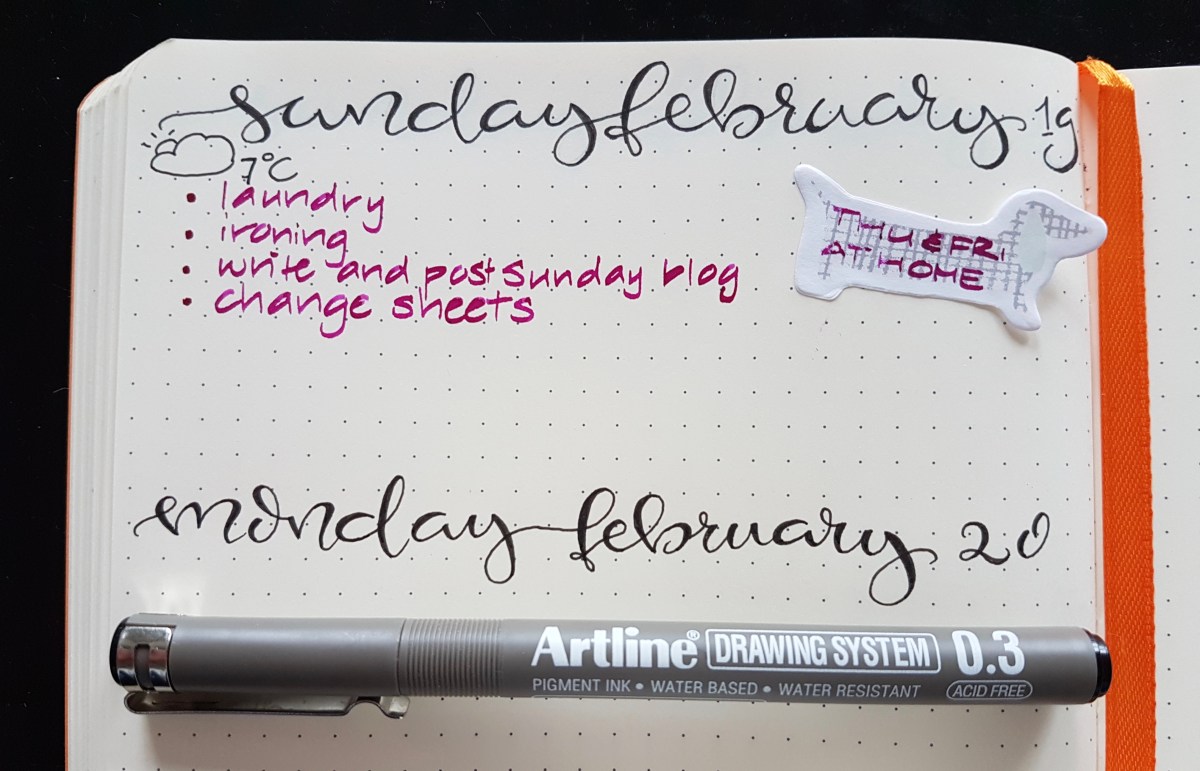
The year calendar lay-out in the top photo is designed by Laura Krenk of @nerdy.teacher. I purchased her diary lay-outs through her Etsy shop.